

I should start off by saying that I am not a jewelry maker. I happen to own a couple jewelry tools and some random beads because long ago I thought I wanted to be a jewelry maker. I think I have made one pair of earrings in my life. I also know all things bird are a tad overdone, but can't really help myself. And if you've ever seen Portlandia, you can see the humor in my situation. What can I say? I love birds, nests, eggs and feathers with all of my heart. I'm a complete cliche. About a year ago I started seeing nest pendants in etsy shops and thought they were so beautiful. One night, while working my way through a season of Bones on Netflix, I found my bag of jewelry tools and beads and thought that I might try to make my own nest. But I didn't want a necklace pendant (I already have a lot of necklaces), I thought maybe I could make a ring. Turns out, I can, and so can you!

You will need: 24 gauge jewelry wire, wire cutters, and three roundish beads that you like.

Put your three beads onto the wire, leaving about 8-10 inches of a leader. Measure out about a yard of additional wire and cut.

Twist the wires together.

And then weave the short end in and out of the wires that hold the beads.

Then start wrapping the long end of the wire around the edge of the beads, making your nest. Wrapping it around your finger and then pushing the looped wire down around the beads works also. Experiment with it. The wire is very forgiving.

When you have about a foot of wire left, begin to attach the nest to the eggs by looping the wire through the original wires that hold the beads and the nest loop. Do this in three spots, evenly spaced around the nest. After you have done this, push any extra wire underneath and through the back of the ring, securing it further. Snip the end of the wire, if necessary.

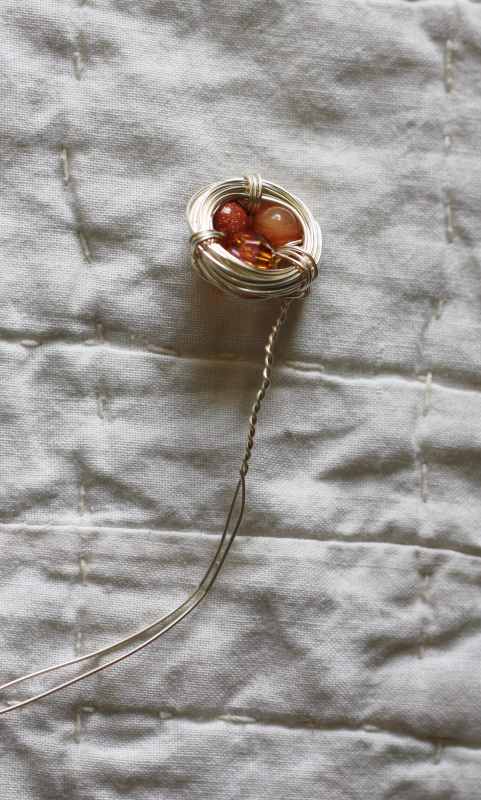
Here you can see a picture of the back of the ring. There are many wires squirming around. Snip another length of wire, about 12 inches long, and run it through the side of the nest on the back. I did it where the securing loops are. Fold the wire in half and then twist the wire to fix in place (like we did in the beginning, when securing the beads).

Continue to twist and twist the wire until it is as long as you need it to be to fit on your finger.
Loop the ends of the wire to the underside of the ring on the other side. Twist the wires to secure and then tuck the remaining wires into the back of the ring, twisting and pulling it through, so that it won't come loose. Snip the wire, if necessary.


No, this isn't a toe ring, I just happen to have very stumpy, pudgy fingers. I've worn these all week and have received many compliments. This would make an awesome Valentine's gift for a friend (or a sister). Have fun with this simple project!
-Amy
Soooooooooooo cute! I can't wait for you to send me mine!:)
ReplyDeleteI'm intimidated to try this....but looks soooo cool! I have had bannanna "smoothies for the last two days in a row! Brilliant.
ReplyDeleteIs there a craft you two can't do? I too think this looks intimidating, but I think with the pics I could do it!
ReplyDelete