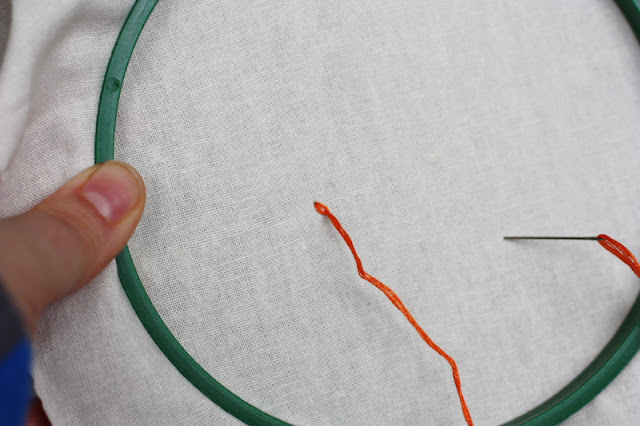

I love embroidery! Growing up I learned how to cross stitch, and never really knew much about embroidery. It wasn't until a couple of years ago, when I started seeing antique embroidered hand towels every where I looked, that I got really excited about the craft and wanted to learn how to do it. I had inherited a huge box of embroidery thread from my mother and grandmother, so it wasn't long before I had embroidered my own dish towel and then a couple of t-shirts for my nieces. I loved it so much that I started creating art pieces to give as gifts and then I made a huge batch of embroidered birds for Christmas ornaments and gifts.
I think the reason I love embroidery so much is that there is really freedom to do whatever you want. There is no pattern. The possibilities are endless. I also love all of the many colors of the threads. I'm a sucker for bright colors. In fact, the most difficult part of any embroidery project for me is deciding what colors to use.
The other benefit of embroidery is that it is a hand project. You only need a couple of things to do it, so you can do it anywhere. To do any project you will need scissors, an embroidery needle (it has a larger eye than other needles), a hoop (cost about a dollar at most stores), embroidery thread, and something to embroider on. My preference is linen. I bought a yard more than two years ago, and still haven't used all of it up.
I'm going to teach you of the most basic embroidery stitches today. I don't do the traditional embroidery stitch, just because I have never gotten the hang of it, so I'm going to show you how to do the ones I use the most often.
The first thing you have to do is thread your needle. Embroidery thread comes in a string with six strands to the rope. Cut off a couple feet and then separate the threads into two groups of three. Put one of the groups to the side and fold it in half, so you have a rope of six again, with a loop at the end. Thread the six threads through the needle. It should look like the picture above. This is going to give you a nice beginning to your embroidery, without a knot in the back.
Poke your needle up through the back and pull it almost all the way through, leaving a little of the loop hanging in the back.
(back side)
Put your needle down about an eighth inch in front of where you pulled the thread through, and pull your needle down through the back side.
(backside)
(backside)
Then put your needle down through the exact hole where you ended your last stitch.
Repeat until you have a nice line. Next stitch -- I call it a raised straight stitch. This is when you want your line to stand up a little taller. Do your first stitch, just like the straight stitch,but when you start your second stitch instead of putting your needle down where your last stitch ended (as in the picture above), you are going to put your stitch down in the middle of the last stitch. You can see that below.
Keep up your stitching, always going back down in the middle of your last stitch until you're at the end of your line.
(Straight Stitch on top and Raised Stitch on the bottom)
Sorry for this lengthy post full of pictures. On Thursday I'll post pictures of a couple more stitches, then we'll be ready to do the Christmas ornament that I want to share with you. Who knows? Maybe some of you will come to love embroidery as much as I do.
-Amy


I love your embroidery Amy! I need to pull mine out :)
ReplyDeleteAwesome! I have been intrigued ever since you gifted me a darling little bird on a linen towel! It makes me smile every time I use it!
ReplyDeleteI Love the birds.
ReplyDeleteAmy I have been wanting to learn how to embroider for a while! Since we never have time when I visit I am so happy to see instructions on here. Could I see another shot from the backside of your threads. I am really at visualizing it. Thanks for the post sis!
ReplyDelete